Cards

Not only do I love giving homemade gifts to those I gift to, I always try to give a homemade card. My mum is the card queen and I could steal some of hers but I my style is very different. I am a paper girl and like combining papers and embellishments on my cards whereas my mum is a stamper and prefers stamps and other elements.

Below are three cards I made for three very different occasions.

IMG_3818

The first is for a male friend turning 40. I always find boys hard to cater for… I think not having a male in my life (Charlie doesnt count) I dont really always know what works. But managed to find some classic blue, red and black papers in my stash. Just layered them up with double sided tape and used silver stickers for the letters.

IMG_3814

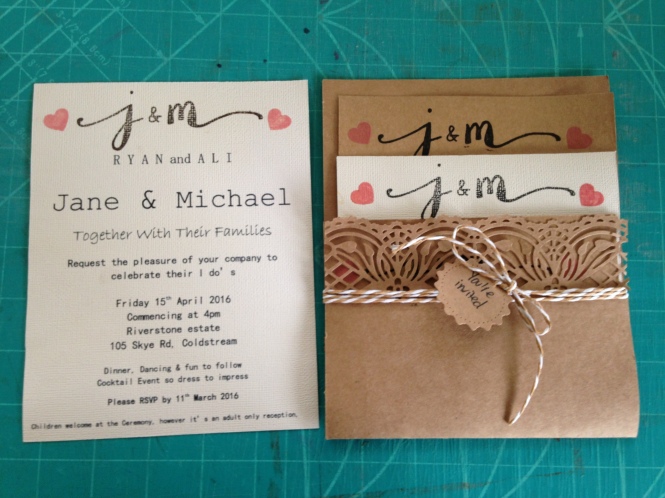
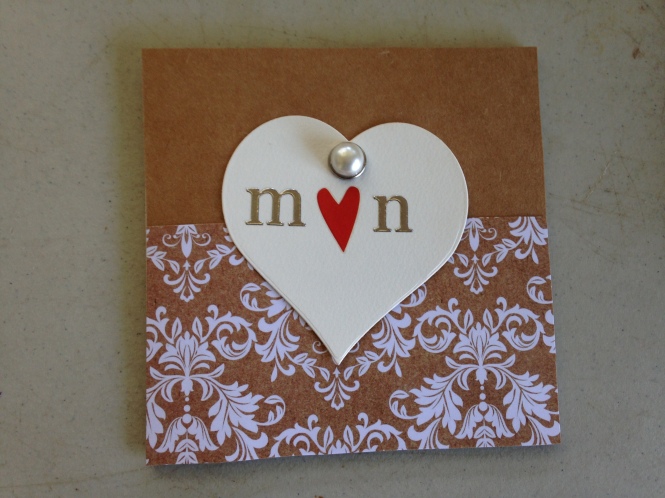
The second is for a young couple on their engagement. They are a very simple couple and the invites were brown kraft card, so I got an idea of their theme. Again, trying not to be too girly. This was a simple one with two types of paper and a simple cut out heart, with their initials in the heart and a rub on red heart. Simple but hopefully appreciated.

IMG_3816

The third was very simple – for a second bub due and the sex unknown. Foxes are an in thing at the moment and they are leaning to a green or yellow pallet so just used these two papers for a simple card.

IMG_3815

It is amazing what you can create with a few simple pieces of paper, even when you are suffering from a virus and just want to be in bed. I encourage you to give it a go, as there is something special about receiving a handmade card rather than store bought basic.

IMG_3819

Simple Cards

There is nothing better to me than to put together a handmade card for when someone has a birthday or for any reason you get a card. My mum is amazing with her cards, and does stamping and all sorts of amazing techniques. I am more a paper and embellishments girl.

I threw these two together for a mum and daughter, who love pink.

IMG_3694

The first is a simple metallic paper attached to the card, with a diamante strip and a half paper doily. I wasn’t sure about the doily but it was too late to take off!!

IMG_3696

The other was a simple printed paper attached to the card with some lace kept on using brads.

IMG_3697

Both very simple, but there is something extra special about receiving a hand made card (I think!)

Wedding Invitations

I do love to create with paper as well as with fabric and food. When my brother finally decided to ask the love of his life to marry him, I offered my services to create their wedding invitations. It was my wedding present to them. From creating, printing, sourcing all paper and accessories and posting them, I wanted to make it as easy for them, but also as personal and full of love as could be.

Thankfully my new sister is a simple, neutral person so there wasn’t a huge level of stress or complication or changing of minds…. I mean, she is a bride so these things happen! But from a few trails, to seeing an invite in a shop window and a bit of pinterest, we got to these beauties!

IMG_2066

The colours were brown craft card and an ivory kaisercraft card with a slight pattern.

The j&m motif was found online and then I had a stamp made (that was the hardest part) so that each page could be stamped and for the main invite, this monogram was embossed.

The pink hearts were a simple stamp that was also stamped and embossed.

Both embossing was done with coloured ink and clear emboss.

IMG_2961

Each of the internal cards were tiered to look pretty once the main invite came out.

IMG_2960

The cardboard case was done with a Sizzix die cutter, with a die mum had from England. We have discovered that die cuts and thick kraft card don’t work well together and did have to replace a spring in the Sizzix as there was a lot of pressure required to cut through completely.

All were tied together with a brown and ivory paper twine that fitted perfectly! With a die cut fluted circle hand written on. And then packed into envelopes and posted. Was somewhat glad it wasnt a huge wedding in the end!

They were simple but time consuming, but was such a blessing to be able to do something so useful and beautiful to bless my brother and his beautiful bride.


Long wait… Sorry

Hi all,

Sorry I have been quiet for so long. Life has got out of control. I have still been creating and photographing, but without a laptop posting is hard.

The craziness of my first season of Christmas Markets saw hundreds of elephants created and sold, but not much time for much else. Followed by creating a hundred or so wedding invites as a wedding present for my brother also took up a fair bit of time and love.

On top of this I have changed jobs, and very badly damaged my back, prolapsing some discs and creating severe sciatica. And lying on the floor on ones tummy makes sewing, knitting and all the fun stuff  a bit difficult!

But rest assured, there has been lots happening and hopefully over the next few weeks you will see posts pop up to make you smile, inspire you and get your creative juices flowing. I share because creating makes me happy. In the midst of life and craziness, being able to create and especially share that creation with someone is my greatest joy.

Don’t stop creating, sharing and loving

Stone Fruit Ice Cream

years. Everytime we head up, particurly in the Aussie summer, we get loaded up with the best, freshest fruit around. If you haven’t eaten ripe stonefruit straight from the tree, you are missing out on one of the best experiences available on this earth. So so good!

After Christmas this year we were loaded up with white peaches and yellow nectarines, and there was no way I would eat them all. Plus the crazy hot 40 degree weather meant that they were ripening too quickly. So I decided to try something different.

I cut up both the nectarines & peaches, and drizzled with maple syrup.

IMG_0303 IMG_0302 IMG_0306 IMG_0305

I then roasted each tray at about 200 degrees for 20 minutes. The smell was amazing! Once cooled, I pureed each batch in the food processor until reasonable smooth. Some skin was left in. These mixes were then refrigerated

IMG_0309

I made a sugar syrup as you would for any gelati in your icecream maker, and added this to each mixture. I also added a can of coconut cream to each and chilled overnight. I then put them each mix into the icecream maker.

Twenty minutes later, delicious, lactose free icecream! Will need to use less maple syrup next time around, it was a little overpowering on the flavour, but otherwise, delicious, creamy and fresh.

IMG_0314 IMG_0311 IMG_0313

Tonka garden

Once again, another Pinterest inspiration!

We have a family kris kringle for Christmas and one of the categories this year was ‘original’. I saw this idea to plant up a tonka truck on Pinterest and thought ‘awesome’.

Didn’t have a spare tonka truck lying around, but picked up two for $1.45 pickup on ebay!! Dad has a massive succulent & cacti collection, so have raided that.

And now I have a pretty ‘original’ present for my Uncle this Christmas!

IMG_3027 IMG_3029 IMG_3031 IMG_3032 IMG_3033

Headpiece

Have really been inspired by the Great Gatsby and all the 1920s styles – headpieces, drop waist dresses, lace – just gorgeous.

For a recent wedding I ran out of time to make my own dress (so I picked one up from an op shop!!) but did manage to be able to make a headpiece.

I cut out a piece of lace that I got as a large piece to go onto a dress for a different wedding (!) and covered it in modge podge to give it stiffness. I then attached beads onto it to create highlights and dimension. It was then hand sewn on with black thread to a plastic headband.

If I must say, it looks pretty good on – and whenever I wear it I get compliments – I have done a couple of others since and am considering doing some to add to my sales at markets & online.

IMG_1842 IMG_1843